The Complete Guide to Canadian Road Signs
Every province runs its own knowledge test, but almost none of them invented their own sign system to go with it. Nearly every sign you’ll see anywhere in Canada traces back to one shared national reference — the Manual of Uniform Traffic Control Devices for Canada (MUTCDC), published by the Transportation Association of Canada. Learn the small set of shape-and-colour rules underneath it, and you can work out what an unfamiliar sign means anywhere you drive in the country — not just the ones you happened to memorize.

Most students try to memorize every sign one at a time, and it’s exhausting. I always tell mine to learn the six shapes first — once that clicks, you can usually work out what a sign you’ve never seen means, instead of just guessing.
The Six Shapes That Do Most of the Work
Before you can even read a sign’s text or symbol, its outline has already told you something. That’s deliberate — a driver going 80 km/h needs to register a sign’s category before they’re close enough to read details on it. Per Saskatchewan’s official Driver’s Handbook, six shapes cover almost everything:
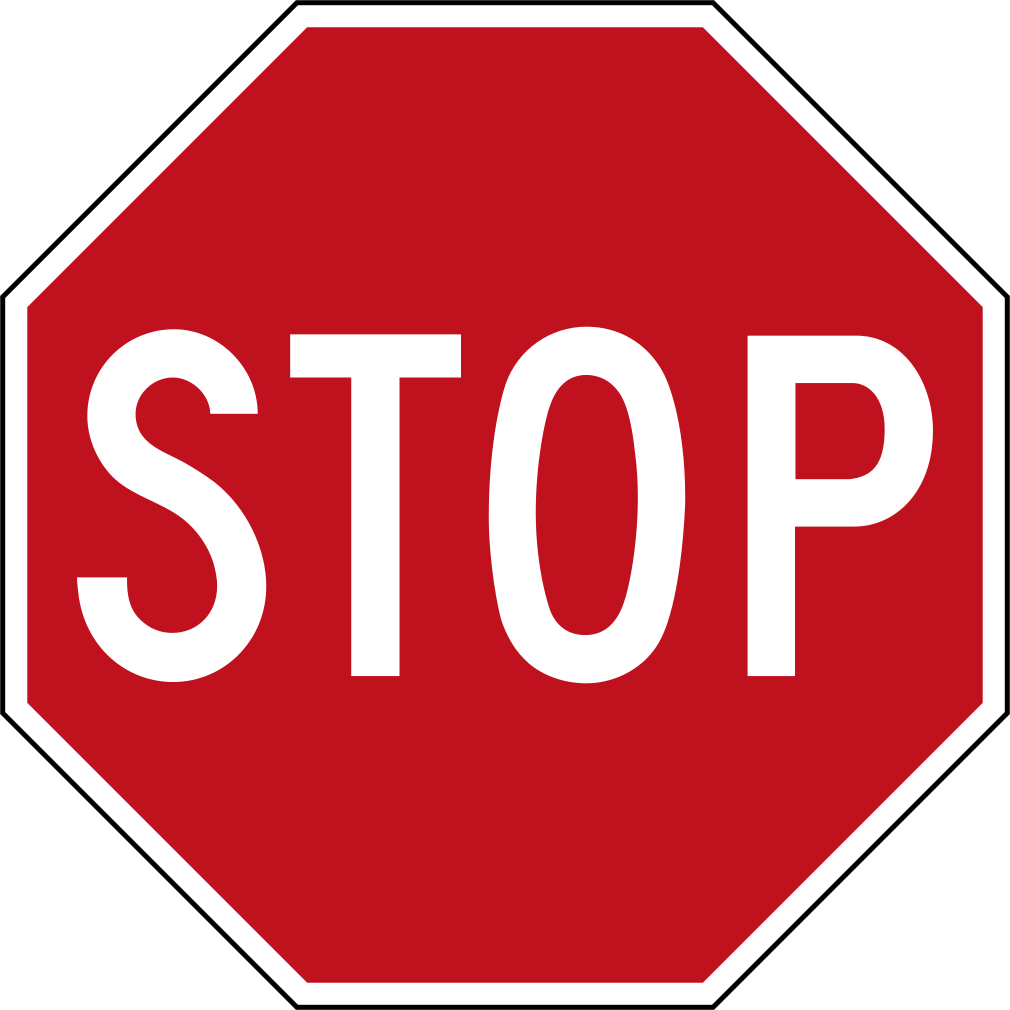
Octagon
Stop — and nothing else. This shape is never reused for any other sign.
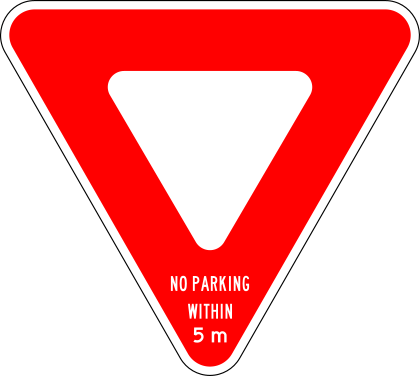
Triangle
Yield — red border, white background, point facing down.

Diamond
Warning — yellow for general hazards, orange for construction zones.
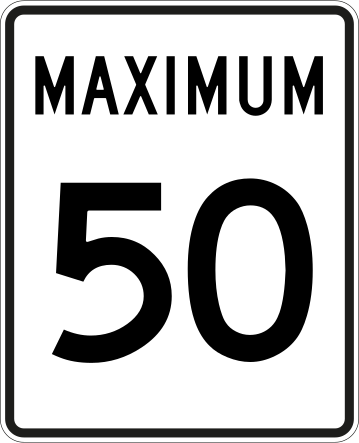
Rectangle / square
Regulatory — white background, states an actual legal rule.
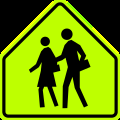
Pentagon
School zone — fluorescent yellow-green, black children silhouette.
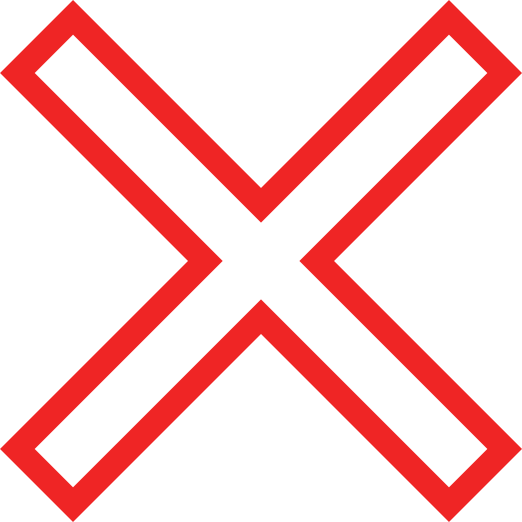
Crossbuck (X)
Railway crossing — same meaning as a yield: stop if a train is close.
The jagged points on a triangle or diamond aren’t decorative either — sharp angles read as “caution” to the eye faster than a smooth shape does, which is exactly why warning and yield signs use them and purely informational signs don’t.
Colour Adds a Second Layer
Shape tells you the category; colour usually narrows it further:
The Six Categories You’ll Be Tested On
DriveReady’s own Road Signs reference section is organized around the same six categories that show up across provincial handbooks: Warning, Regulatory, Informational, School Zone, Construction, and Emergency Vehicles. Rather than duplicate every individual sign image here, this guide focuses on the reasoning — use the reference section itself as your visual library once you understand the system below.
See every sign, sorted by category, with real images: drivereadycanada.ca/road-signs — or browse all of them on one page at /road-signs/all-signs.
Where Provinces Actually Differ
Since every province builds from the same national manual, differences are the exception, not the rule — but a few genuinely exist:
- Bilingual text. Quebec and New Brunswick signs frequently pair French and English (or appear in French alone in Quebec), even when the shape and colour underneath are identical to the rest of the country.
- A handful of province-specific signs. Quebec, for example, has its own moose-crossing warning sign (D-270-14) that doesn’t appear in most other provinces’ handbooks — still a standard yellow warning diamond, just a genuinely regional addition.
- Minor wording differences on regulatory signs (parking restriction phrasing, school zone hour tabs) from one province’s Highway Traffic Act to another’s.
None of this changes the underlying system — it just means a sign you’ve never seen before is still worth reasoning through rather than assuming it’s unrecognizable.
A Study Method That Actually Sticks
Memorizing individual signs one at a time is slow and doesn’t transfer well to signs you haven’t seen before. A better approach: learn the shape-and-colour system first, test yourself on signs (including ones you don’t immediately recognize), review what you got wrong, work out why that shape or colour applies, and come back to the ones that tripped you up a few days later.
- Learn the shape/colour system
- Test yourself, including unfamiliar signs
- Review what you got wrong
- Reason out why that shape or colour applies
- Come back and test yourself again later
Take a sign you’ve genuinely never seen: an orange diamond with a worker silhouette. Even without knowing the exact sign, the colour alone tells you “temporary condition ahead, likely construction” — and that’s a far more useful skill on test day than having memorized 80 individual images.
A Study Plan
- Session 1: Learn the six shapes and six colours above until you could sketch the pairing from memory.
- Session 2: Go through DriveReady’s Road Signs reference category by category, covering the label and guessing the meaning from shape and colour alone before checking.
- Session 3: Take a mixed practice set and note every sign you missed, then look up what made it belong to its category.
- Session 4, a few days later: Retest on exactly the signs you missed before, not a fresh batch.
How You’ll Know You’re Ready
- You can explain why a sign belongs to its category from shape and colour alone, not just recognize the specific image
- An unfamiliar sign doesn’t throw you — you can make a reasonable guess at its category
- You’re comfortable across all six categories, not just the common ones
- You’ve reviewed the specific signs that kept tripping you up, not just retaken the same practice set
Test-Day Advice
- If a sign looks unfamiliar, use shape and colour first — it narrows the answer even when you can’t recall the exact sign
- Watch for signs that combine a base shape with a supplementary tab (like a school zone pentagon with an hours-of-operation plate underneath) — the tab often changes what’s actually being asked
- Don’t assume every sign will be pictogram-only; some regulatory and informational signs rely on text, especially bilingually in Quebec and New Brunswick
- There’s no need to rush — reasoning through an unfamiliar sign takes a few extra seconds and is far more reliable than a guess
The Bottom Line
Canadian road signs aren’t actually thousands of things to memorize one at a time — they’re a small, consistent shape-and-colour system with a handful of genuine regional variations layered on top. Learn the system first, and the individual signs mostly explain themselves. Once you’re confident on signs, move on to right of way rules — the other big knowledge test topic.
Put it to the test
Try a free practice test for your province and see how the sign questions actually go.
★ Start Free Practice Test